Tuesday, June 14, 2016

Large Scale Collaborative Backdrop


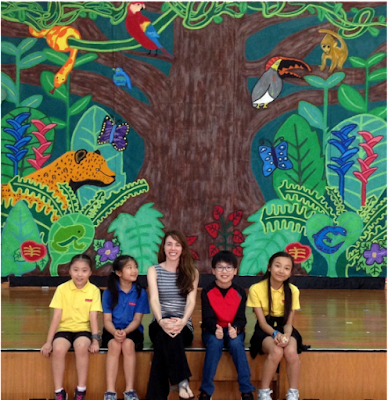
I am so proud of these students for tackling such an enormous project! We had a blast working on this (giant!) backdrop for the annual whole school music performance as part of our after school art club. 

The theme for this year's music performance was based on the book The Kapok Tree by Abigail Thomas. The students used the book for inspiration in order to start their design. They each chose which animals, plants, and rain forest flowers they would like to draw and set to work drawing and planning out their ideas. 

Each drawing was individually scanned and uploaded to PhotoShop so we could piece together the final image as a whole. (This was a very similar process to how another group of students took part in the Library Mural from a previous post) The students decided on the final scene below after copying, pasting, and rearranging their drawings on PhotoShop.  


Once the final scene was complete the image was projected onto large rolled canvas that I had previously cut and hung in the gym. The students then traced their original drawings on a larger scale. When the tracing was complete we laid out the canvas and started by painting the tree and background first. Details in the plants and animals were added last. 


This small group of students worked so hard, they even dedicated their lunch recess to come in to paint! Their enthusiasm, creativity, and effort was appreciated by all! 
Stop Motion Animation with iPads

I have been wanting to try out stop motion animation with my students for some time now, but I have always been a bit intimidated to do so. I was not very familiar with the different apps available, I did not have access to iPads at school, and I just wasn't quite sure how to put it all together successfully into a lesson. However, I knew my students would be absolutely thrilled to try something new so I started researching and downloading different apps and experimenting with them at home. I also came across this amazing guide to stop motion animation in the art room: A Complete Guide to Stop Motion Animation . This was such a huge help to planning out my lesson!

I ended up having students bring iPads from home since we did not have them available at school. Students who did not have iPads borrowed mine or shared with a partner. To introduce the lesson we looked at a variety of stop motion animation videos and discussed them as a group. I also showed the students this great tutorial for Stop Motion Studio (the app we used in class) by Watchwaddle on YouTube:


The students were then ready to write out their stories, plan characters and materials, and design their sets. Each student chose something different to work with and all of their stories were unique! I had a student use legos, another brought in stuffed animals from home, some worked with clay, while others wanted to draw and color their own characters.


We had so much fun with this! I am looking forward to incorporating iPads in the art room more frequently in the future with a variety of fun apps for students to experiment with. I am excited to share about what we are up to next!

Movement Unit


My second graders started this unit by inquiring into movement and body shapes within art. They began by comparing and contrasting different artists and how movement is portrayed in a variety of ways and styles. Our focus was on Keith Haring and we discussed the simple contour lines and shapes within his work. The students then set off in their sketchbooks drawing poses of their choice, practicing different lines and shapes to show their chosen movements. Before we started sketching, we viewed this short animated clip of Haring's work. It definitely inspired some new poses as well as dance moves!  


After the initial practice sketches, the students were split up into small groups of 3 or 4 students. As a group, they needed to design a body shape in a moving pose of their choice. They also needed to decide on colors and details that would influence the feeling of their final piece. Once students had practiced and designed in their sketchbooks, they recreated their plans on a larger scale and the real fun could begin! 


One person from each group was traced on large paper in the pose their group had chosen. They worked together to add their colors, lines, shapes, and designs.   


When all their work was finished each group presented their final piece to the class describing their final title and artistic choices within the piece. During critique we also discussed our accomplishments as well as any challenges we faced while working as a group. The students loved talking about each other's final work and had a lot of questions for one another. They were very proud of what they had accomplished together! 

Process Art


Who doesn't love process art? I love the freedom that comes with experimenting from a variety of mediums, techniques, and materials. The possibilities are endless and the students are always thrilled with their success as well as their new discoveries!

This year during my nursery class we had been learning about color mixing and handling new materials to work on fine motor skills. In order to reinforce their learning the students set out on a large scale multi-media adventure!

Large pieces of white butcher paper were laid out on tables including an assortment of paints and materials. The students could trade places as they worked the only rule was to share what was available at each table. Some students were hesitant at first, but in the end we all enjoyed getting a bit messy!

     
The large papers were painted, printed, collaged, and glittered on for four lessons in a row. The students were not afraid to cover up previous work and layers were added throughout each lesson. Their final masterpieces are a true work of art!